The Intake Editor is where you build and fine-tune the intake wizard your clients complete. You can add your own questions, edit or hide the ones we provide, reorder everything, group questions into sections, and even run more than one intake side by side. This guide walks you through the essentials.
1. Opening the Intake Editor
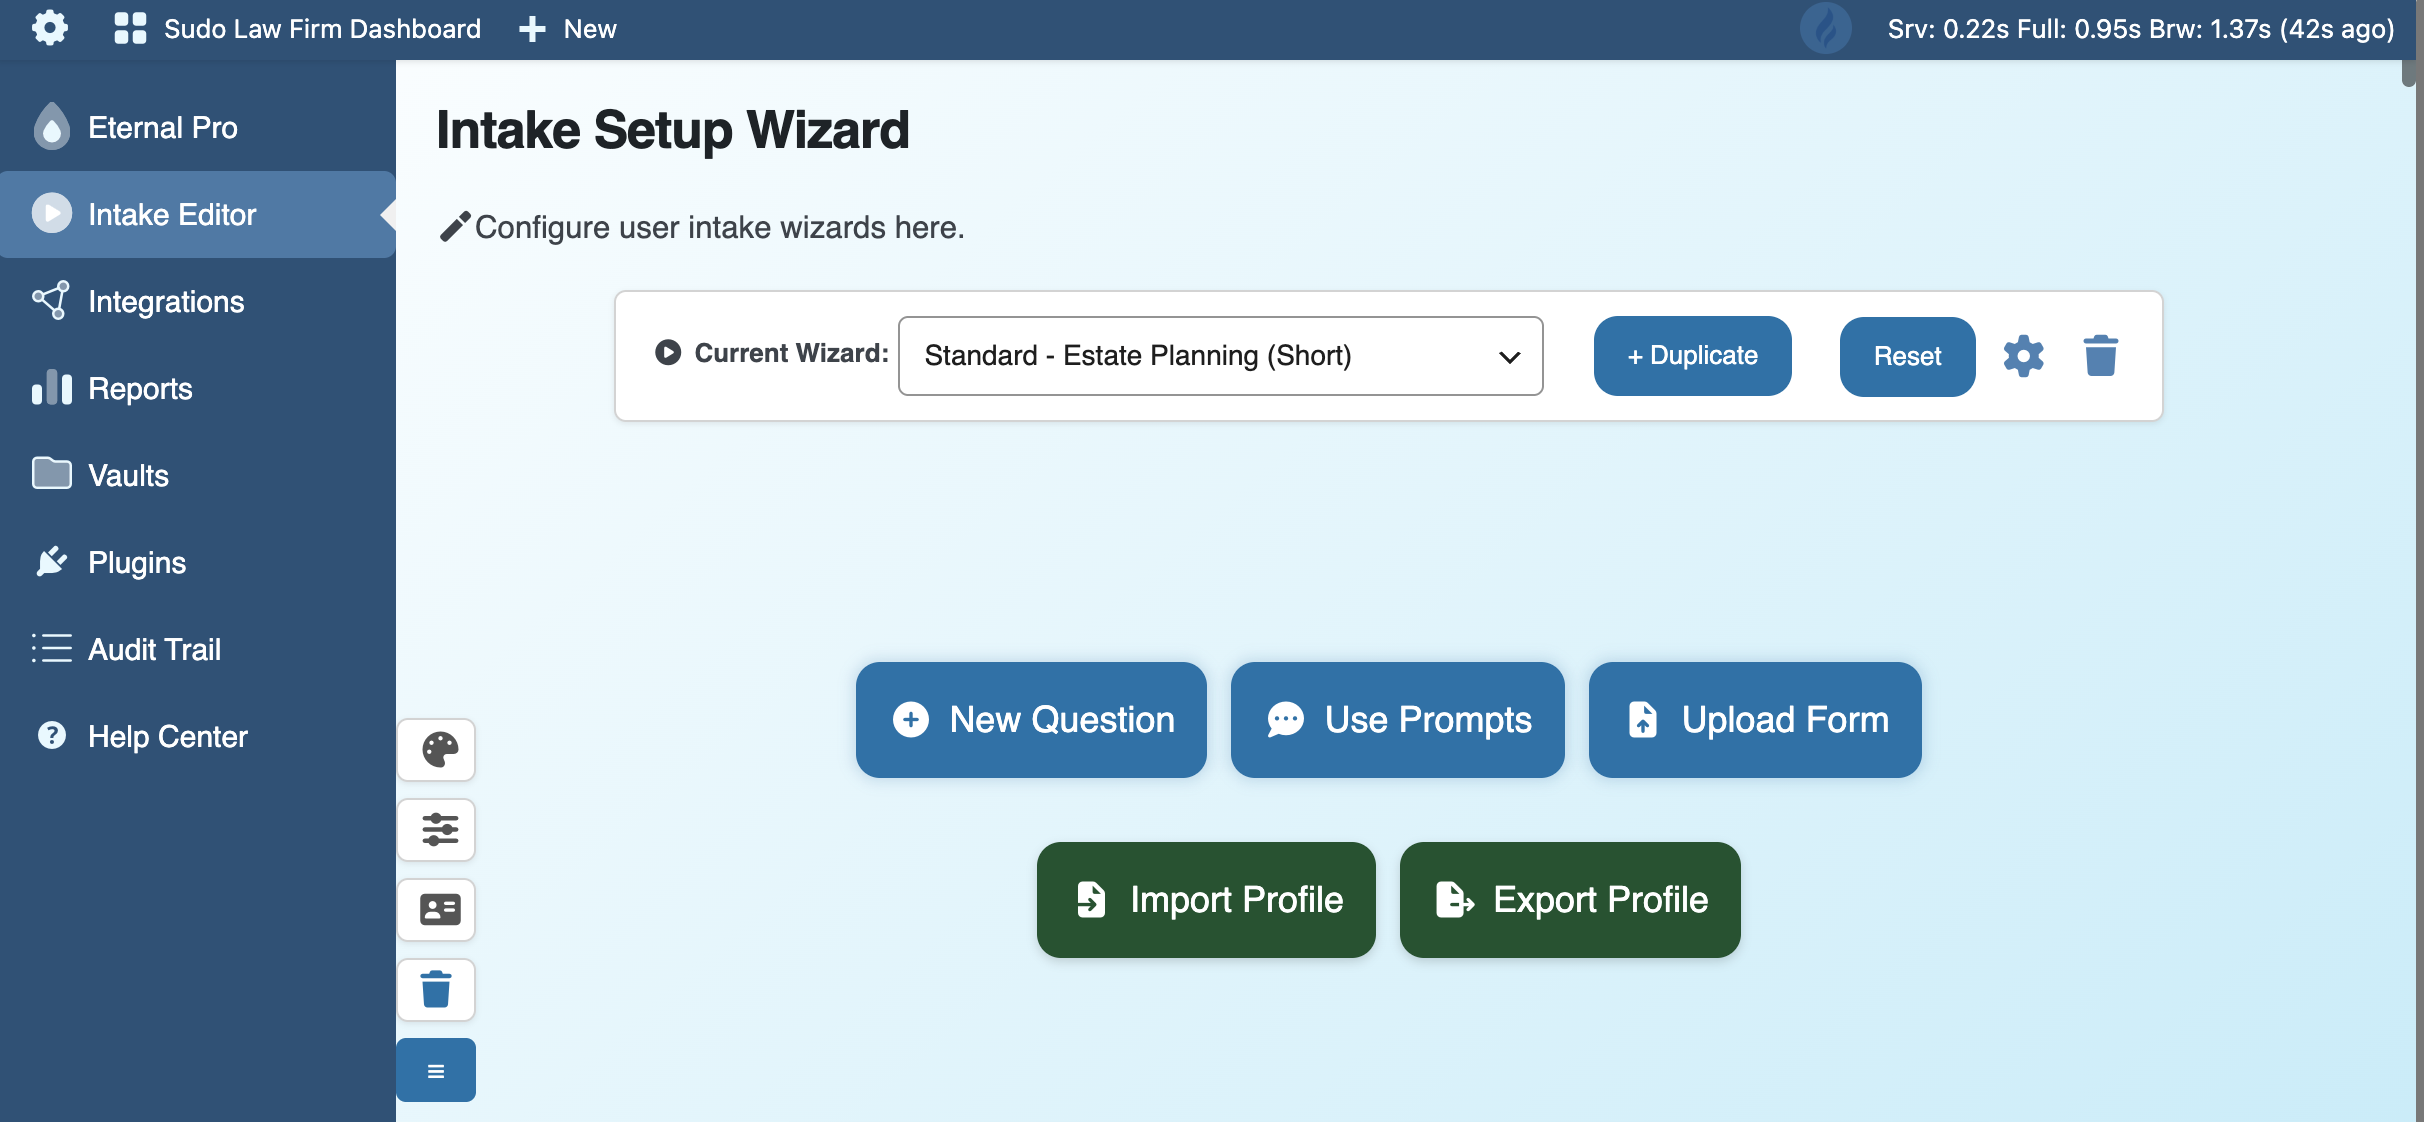
Login to your Dashboard, look in the left-hand admin menu for Intake Editor and click. This enables you to edit your client intake wizards.
What you see is what your clients get. The editor is a live preview. As you add, edit, and reorder questions, your client intake changes.
Important: Changes take effect immediately.
2. Adding a New Question
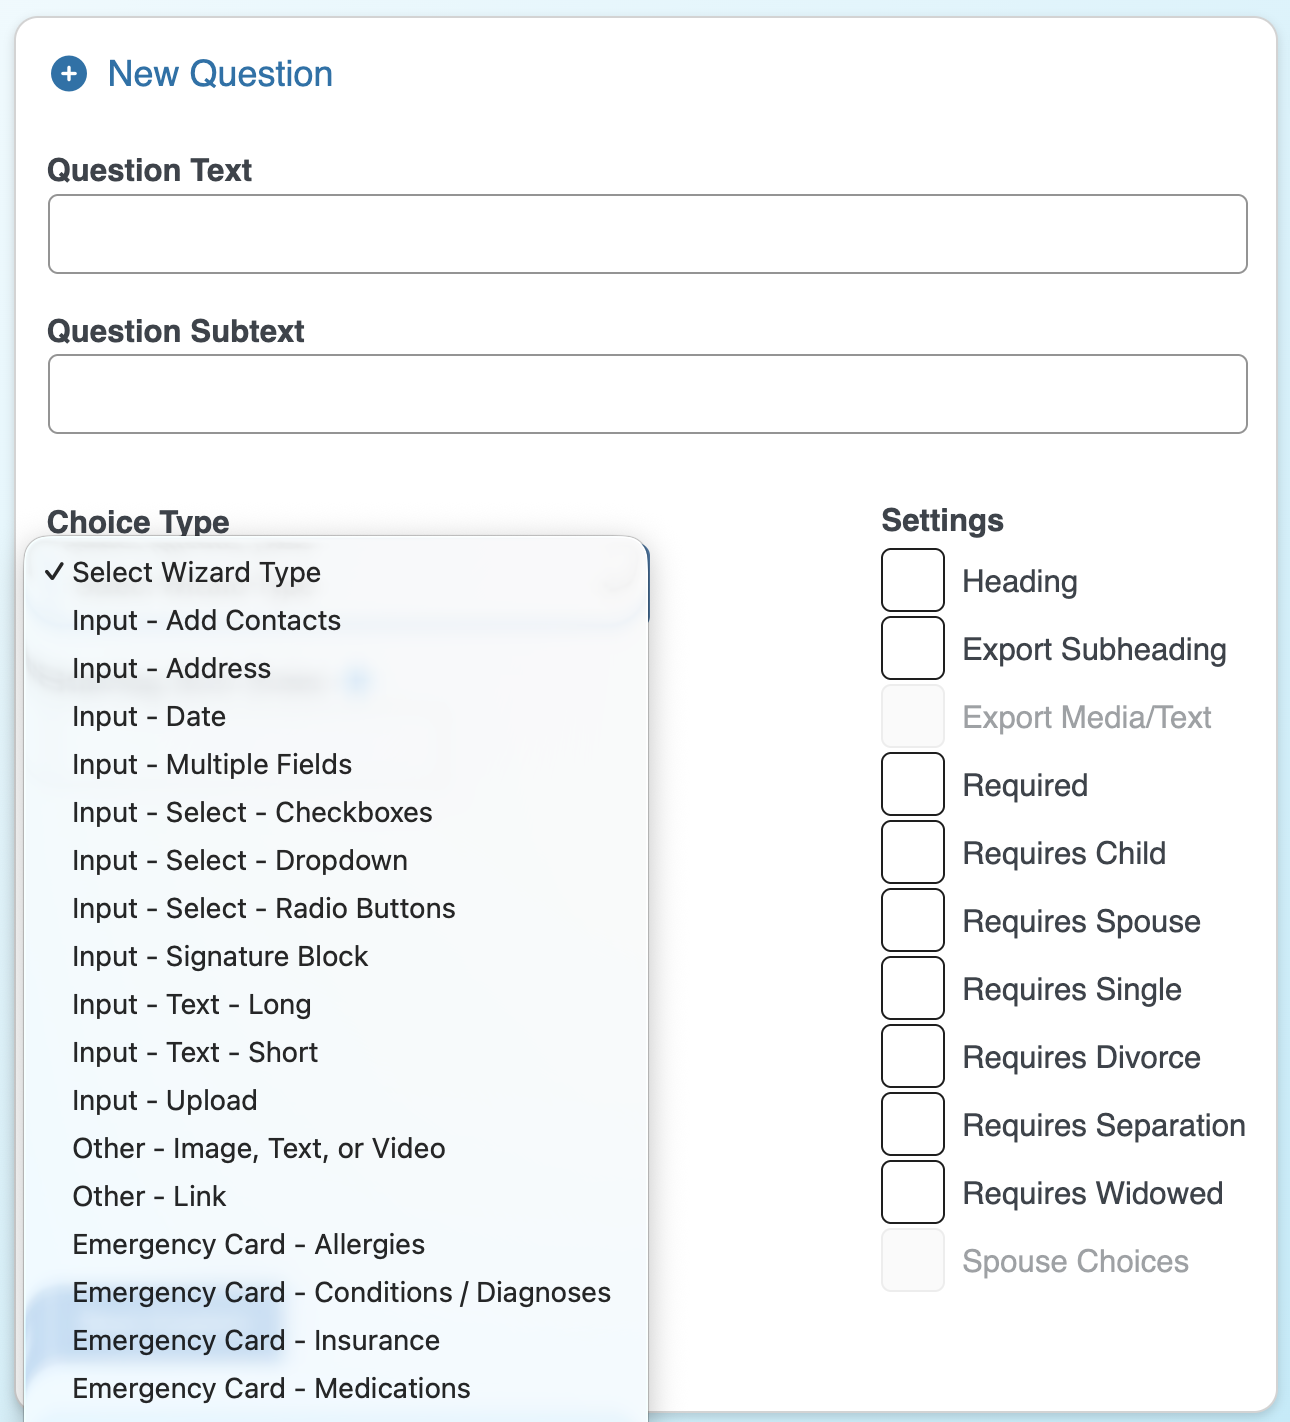
The New Question wizard.
- Click the + New Question button
- Fill in the Question Text — the main prompt your client reads.
- Optionally add Question Subtext — a short line of description shown beneath the question.
- Choose a Choice Type (see the list below).
- If your type needs answer options (radio, dropdown, checkboxes), add each one under Choices using
. - Set any Settings flags you need
- Click Save Question. A confirmation appears and the form refreshes with your new question in place.
Question types you can choose from
| Question Type | What it does |
|---|---|
| Input – Add Contacts | Add or select a contact. You choose the contact fields. |
| Input – Address | Add an address auto-complete input. |
| Input – Date | Add or select a Date picker. |
| Input – Multiple Fields | Include up to three separate input fields for a single question. |
| Input – Select – Checkboxes | Pick one or more answers from a checkbox list. |
| Input – Select – Dropdown | Pick one answer from a dropdown menu. |
| Input – Select – Radio Buttons | Pick one answer from a set of buttons. |
| Input - Signature Block | Add contract terms and a signature block |
| Input – Text – Short | A single-line text box for a brief answer. |
| Input – Text – Long | A multi-line text area for longer answers. |
| Input – Upload | Let the client securely upload a file. Files are stored in the client’s vault. |
| Other – Image, Text, or Video |
A display block. Show an image, video, or explanatory text to guide the client. |
| Other - Link | Enter a URL for the user to click, will open in a new browser tab |
There are also dedicated Emergency Card section types (Medications, Allergies, Conditions/Diagnoses, Insurance, and Special Instructions) for building an emergency information card directly into an Intake.
3. Editing an Existing Question
Every question in the editor, including the standard questions we provide, has a small row of icons beside it.
- Click the pencil (edit) icon to change the question.
- Update the question text, subtext/description, help text, settings.
- Click save to apply.
Custom vs. standard questions: Questions you create are fully editable — text, type, choices, The standard questions we supply can be relabeled and re-configured (text, help, settings, order, visibility).
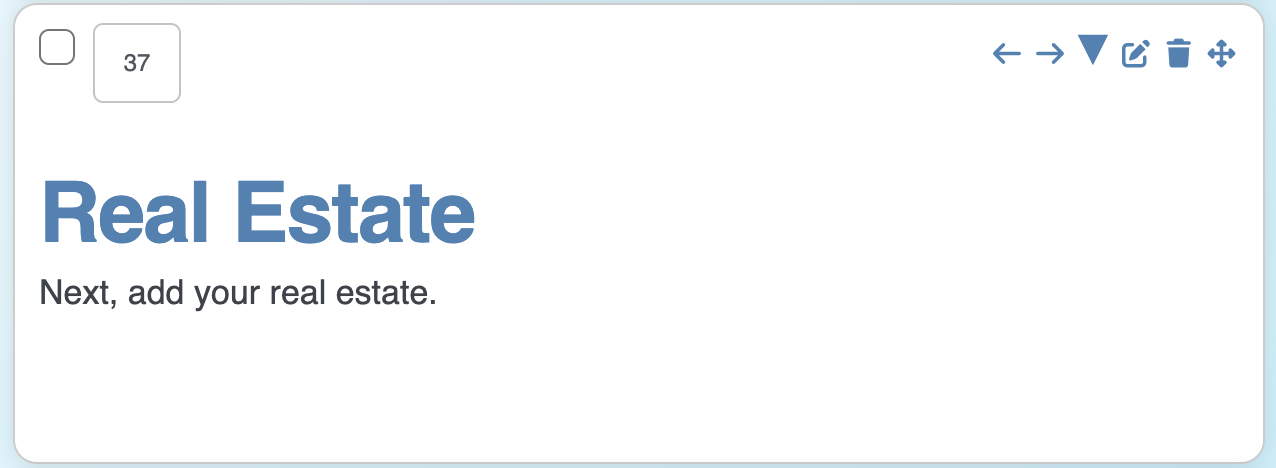
Edit, reorder, and remove icons appear beside each question.
4. Question Settings
When adding or editing a question you’ll find these checkboxes under Settings:
- Heading — turns the item into a section divider rather than a question (see Section 6).
- Required — the client must answer before moving on.
- Requires Child — only shown to clients who have children.
- Requires Spouse — only shown to clients who are married or partnered.
- Requires Single — only shown to clients who have selected Not Married.
- Requires Divorce — only shown to clients who have specified a Divorce.
- Requires Separation — only shown to clients who have specified a Separation.
- Requires Widowed — only shown to clients who have been Widowed.
- Spouse Choices — for single-select questions, adds parallel “You” and “Spouse” columns so both can respond.
5. Reordering, Removing, and Restoring
- Reorder: Grab the reorder (arrows) control
 next to a question to move it up or down in the sequence.
 - Remove/Hide: Click the trash icon
 to hide a question. It stays marked in the editor so know it was removed.
 - Restore: A removed question shows an undo icon
 click it to bring the question back.
 - Numbered Order: You can also directly edit a question's numbered order, instantly re-oredering
Protected questions: A few core questions (such as the intake’s start, the client’s legal name, and the finish step) cannot be deleted, because the platform relies on them. You can still relabel them, but the delete option is not offered.
6. Sections & the Table of Contents
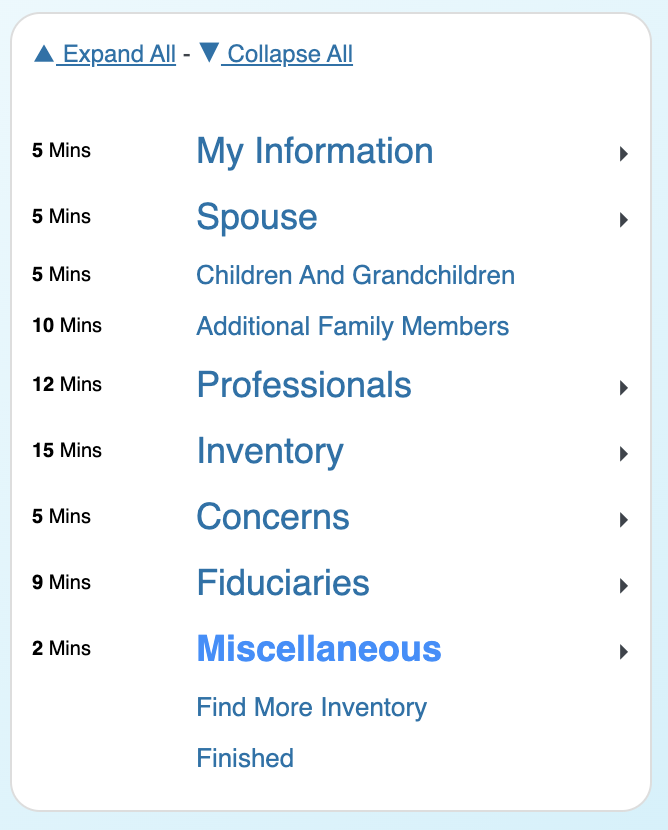
Headings become the client’s table of contents and drive the progress bar.
Long intakes are easier to complete when they’re broken into sections. You can also optionally add durations to each section.
To create a new section heading tile:
- Add (or edit) a question and check Heading.
- Choose the Other - Image, Text, or Video setting.
- Give it a clear title — this becomes the section name.
- Position it above the questions that belong in that section.
Clients see a table of contents and a progress bar built automatically from your headings, s know where they are and how much is left.
7. Multiple Intakes
You are not limited to a single intake: You can build a separate intake wizards, for example an Planning Intake, a Trust Administration Intake, and a Probate Intake, etc., each with its own questions, wording, and order. Changes you make to one intake do not affect the others.
Switching between intakes
Use the Current Wizard dropdown at the top of the editor to choose which intake you’re editing. Everything updates to that intake.

Switch intakes with the “Current Wizard” dropdown; create a new one by entering a New wizard name, and clicking + Duplicate.
Creating a new intake
- Select the intake you want to start from in the Current Wizard dropdown.
- Type a name for the new intake in the name field next to the Duplicate button (for example, “Probate Intake”).
- Click Duplicate. This copies the current intake’s questions and settings into a brand-new intake you can then freely.
Setting the default intake
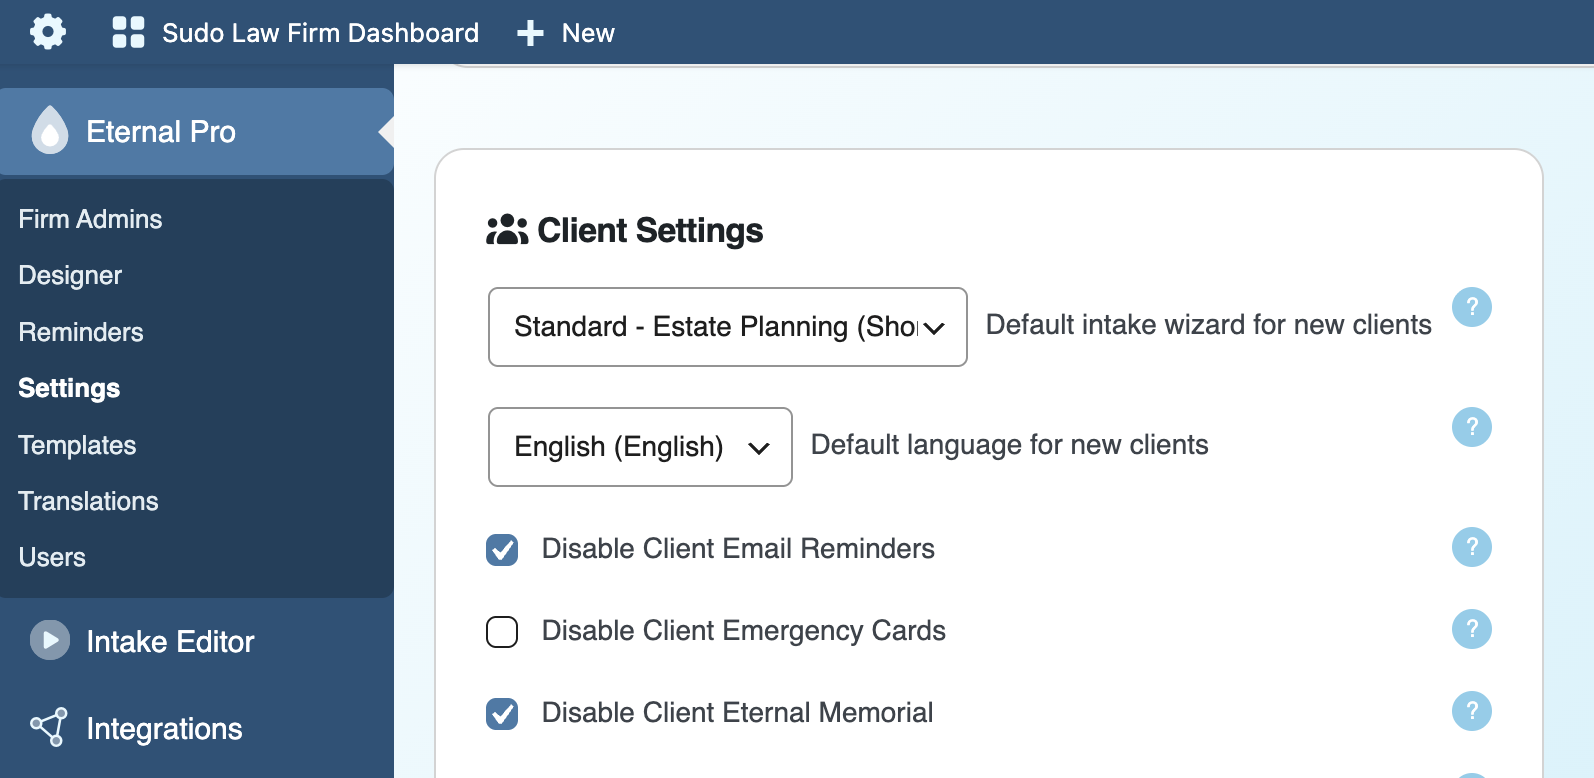
You can configure the default intake wizard assigned to client in the Eternal Pro Settings:
Deleting an intake
Switch to the custom intake wizard you want to delete, and click the trash icon on its row, and confirm.

8. Firm Branding & Display Settings (Super Admin only)
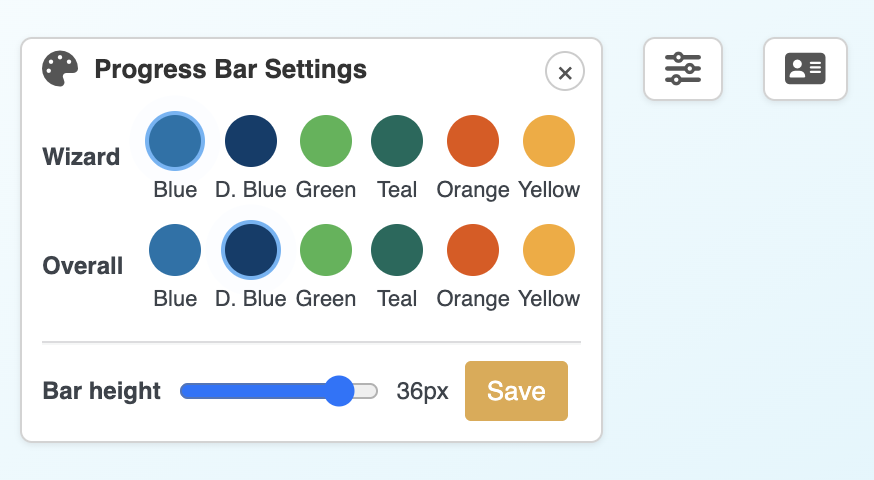
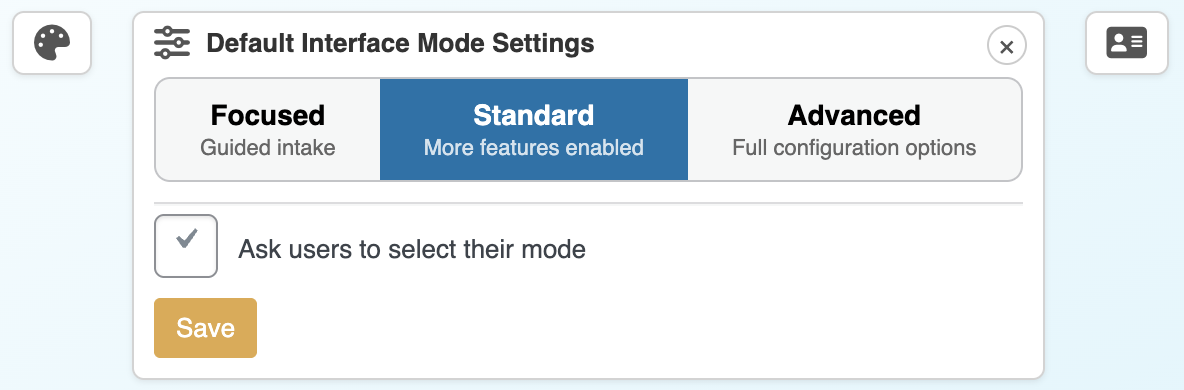
Super-admin display and branding controls in the editor top bar.
If you have Super Admin access, the top bar of the editor includes a few extra controls that affect how the i and behaves for everyone at your firm. (Standard firm admins will not see these.)
- Progress Bar Settings — choose the progress bar’s color
- Default Interface Mode — set the default level of detail clients start with: Focused, Standard, Advanced.
- Intake Contact Details — set the logo, phone number, and email address that appear on your int your firm’s branding.
9. Tips & Good Practice
- Changes are live the moment you save — there is no draft mode, so review each edit as you go.
- Clients already mid-intake keep the version they started with; your changes apply the next time they load it.
- Use headings generously to keep long intakes organized and give clients a clear sense of progress.
- Mark truly essential questions as Required — but avoid over-using it, as it can stall clients who don’t an answer handy.
- Create your own questions when you need full control; relabel our standard questions when you just need different wording.
- Build a separate intake per matter type — an Estate Planning Intake, a Trust Administration Intake, a Probate Intake, and so on — so each collects exactly what that matter needs.
- Experiment safely — duplicate an intake into a test copy to try changes before touching the one clients use.</
Need a hand building your intake? Contact Eternal Pro support and we’ll be glad to help.


 united states
